NetMatch is a Cytoscape plugin to query networks for patterns
Many biological systems arise from complex interactions between components (people, organisms, cells, proteins, DNA, RNA and small molecules). Such networks are naturally modeled as large graphs, which can be analyzed using graph theoretical techniques. Locating subgraphs matching a specific topology is useful to find higher-order connectivity motifs of networks that may have functional relevance in the modeled biological system. In cell biology, it may be of interest to see whether the connectivity of genes of one functional type is similar to some characteristic shape, like a feed-forward loop. In epidemiology, acquaintance graphs between people may characterize specific patterns of disease outbreaks and can be used to optimize vaccine delivery. A query to NetMatch is a graph, some of whose elements are constants and some are wildcards (which can match an unspecified number of elements). The query results are subgraphs of the original graph connected in the same way as the query graph. NetMatch provides an efficient graph matching algorithm with extensions to handle multiple labels per node, multiple edges between pairs of nodes, and approximate queries. NetMatch has been implemented as a plugin for Cytoscape, an open source software platform for network visualization and analysis that is extensible through a straightforward plug-in architecture, allowing rapid development of additional features.
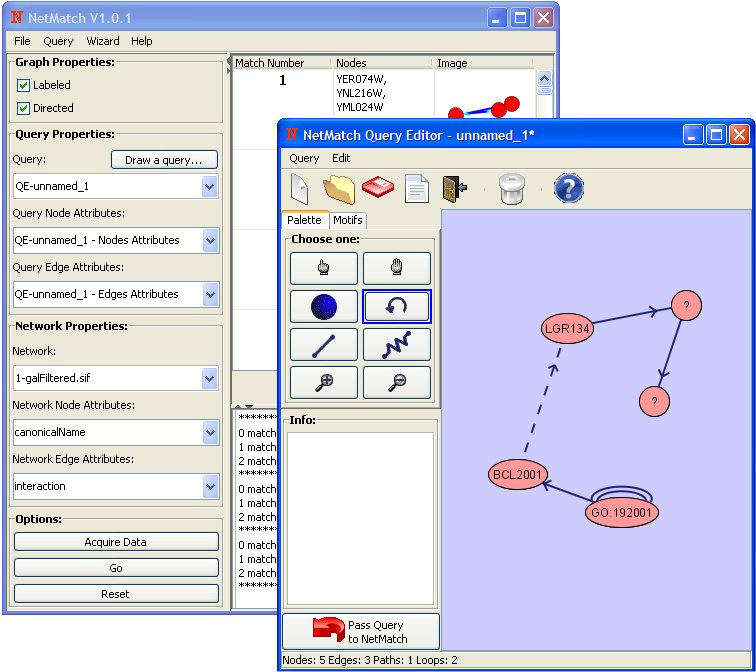
NetMatch supports subgraph matching queries against a target network, previously loaded into the Cytoscape workspace. Approximate queries are special subgraphs that may contain: (a) nodes and edges labeled with a special wildcard symbol ?, which can match any single value of a user specified node or edge attribute; (b) approximate paths, which are paths of length <= n or >=n, where n is a positive integer, that can connect two nodes. NetMatch handles target and query graphs with multi-edges (more than one edge between two nodes), loops (edges starting and ending at the same node), and a list of attributes for each edge and node. The searching (matching) process is carried out by using the state space representation where a state is a partial mapping and a transition between two states corresponds to the addition of a new pair of matched graph nodes. The aim of the matching process is the determination of a mapping, which is a bijection, and consists of a set of node pairs covering all the query graph nodes. When a pair of nodes is added to the partial mapping, consistency conditions are checked. Such consistency rules allow the pruning of the search space, reducing significantly the computational cost of the matching process. Approximate query graphs are handled by first independently processing all maximal specified subparts and then joining in all possible ways the results of the subqueries. The joining process connects the subparts by all paths satisfying the approximate paths present in the query. NetMatch can be set to interpret labeled/unlabeled, directed/undirected networks. Users can express queries in NetMatch by (a) loading from an existing file, (b) importing from the Cytoscape workspace, (c) drawing using the NetMatch query drawing tool.
The query drawing tool allows multiple node and edge attributes, zooming, moving and resizing operations, and exports drawing results directly to NetMatch. It also has a predefined set of frequently used network motifs for convenience. The matching results are shown in NetMatch along with images of matched subnetworks and match information. Clicking on one particular match will highlight its position in the target network in the Cytoscape main view. Any matched subnetwork can be saved and further analyzed and manipulated as a separate network in the Cytoscape workspace, using standard Cytoscape features.
Installation
Download the plugin from the following URL:
http://alpha.dmi.unict.it/~ctnyu/netmatch.html or http://baderlab.org/Software/NetMatch
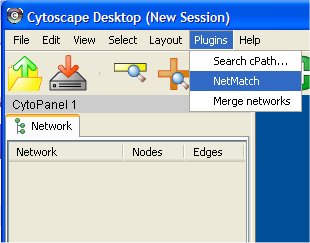
Copy the jar file in the Cytoscape plugins directory. When Cytoscape starts, all the plugins contained in this directory will be loaded. The plugin will be available from the Cytoscape "Plugins" item menu (see figure).
Usage
Load a Network and/or a Query From Cytoscape
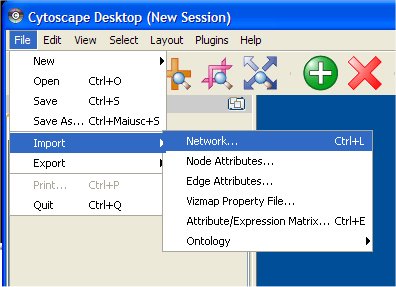
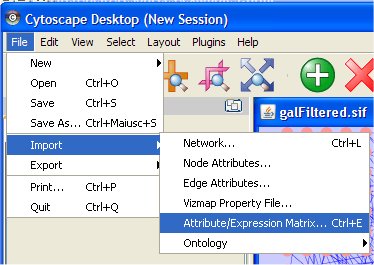
The Cytoscape "File" item menu allows loading networks or queries. Two choices are possible: "Import/network..." or "Open". Moreover, by selecting "Import/Node Attributes..." and "Import/Edge Attributes...", nodes and edges attributes files can be associated with a network. See the main Cytoscape documentation for more information and to find other ways of loading networks into Cytoscape.
Queries can be also defined with the NetMatch Query Tool (see "query drawing tool" help page).
NetMatch Options
Once networks and/or queries are loaded, these will be available through the NetMatch plug-in when executed.
Several options are be available:
Graph Properties:
- Checkbox Labeled enables/disables nodes and edges labels usage (i.e. if the graph has labels and the checkbox is disables it will be treated as an unlabeled graph)
- Checkbox Directed enables/disables edges direction for both query and target network (i.e. if the graph is directed and the checkbox is disabled it will be treated as an undirected graph)

Query properties:
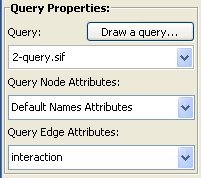
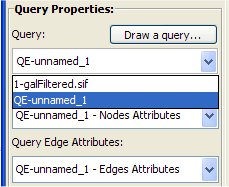
In the box Query Properties it is possible to select a query and optionally its node and edge attributes (query and attributes are loaded from Cytoscape or the query drawing tool). Node and edge attributes are only searched if the Labeled mode is set. When an incomplete set of attributes are loaded, NetMatch considers the remaining nodes unlabeled. In particular, the option "Use node IDs as attributes" uses the node IDs as attributes
Network properties:
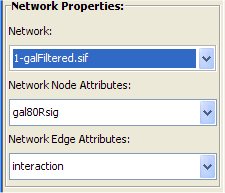
Select a target network in the Network Properties box and its node and edge attributes (target and attributes are loaded from Cytoscape). When an incomplete set of attributes are loaded, NetMatch considers the remaining nodes unlabeled. In particular, the option "Use node IDs as attributes" takes as node attributes the node IDs.
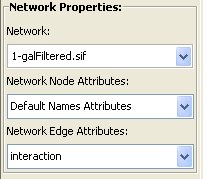
- Network Node/Edge Attributes:
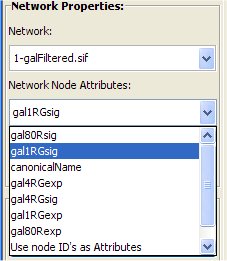
through these menus the user can select nodes/edges attributes to be used during the match. The attribute selected can be boolean, integer, floating point, string or list attribute. In this last case the query attribute will searched into the list attribute.
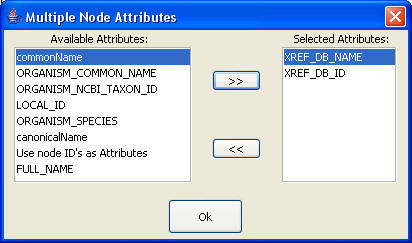
- If the item "List of Attributes" is selected a windows (see figure on the right) allowing to select the attributes will be prompted. The query attribute will be searched into this list of attribute.
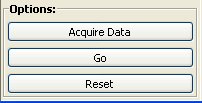
Options:
When query, network and attributes are selected it is possible to start NetMatch. The possibilities are:
Acquire Data: When this button is pressed all open networks and their attributes are loaded in NetMatch, even if they are loaded in Cytoscape after NetMatch is started.
- Go: Run the query.
Reset: Reset NetMatch interface. If there are networks loaded in Cytoscape, they are automatically loaded.
View Results
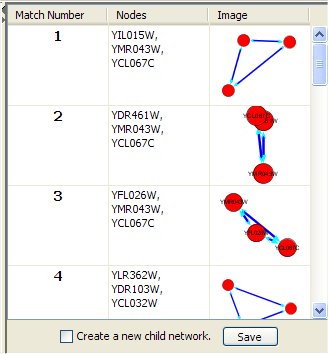
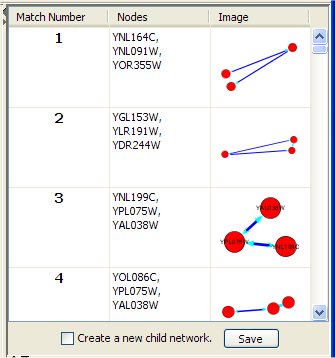
The right top panel shows for each occurrence of the query in the network:
- The match number (numbered 1 to the number of query results, in no particular order).
- The list of the network node identifiers (as given in the corresponding .sif file).
- 2D graphical representation of that match.
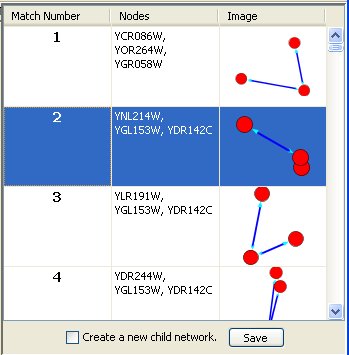
Clicking on one such match, its nodes in the network (shown in the Cytoscape desktop) are selected (highlighted). If "Create a new child network" is checked and a match result is clicked then a new network containing the query is created and displayed in the Cytoscape window. The "Save" button stores information of query results in a text file.
When more than 500 matches are found, it can be time consuming to display all results. In this case, NetMatch asks if the user wants to display all results, display only the text results or don’t show results (in order to refine the search).
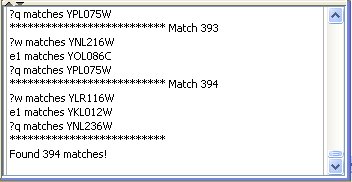
The lower right panel shows a log of match.
Query Drawing
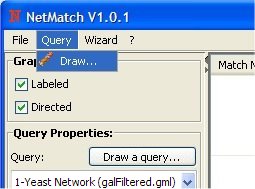
A query drawing tool is launched by "Query/Draw". It allows the user to draw exact and approximate queries. An approximate query contains unspecified node labels and edge labels, paths of length greater than one (specified as an attribute of the path connector).
Palette Toolbar
 Select: Move and resize a selected node or edge.
 Move: Selecting this button allows moving the entire query in the drawing window by clicking on it and dragging.
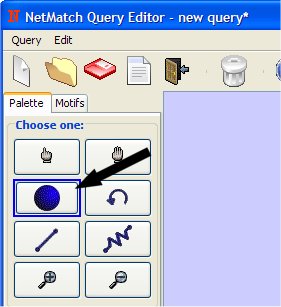
 Add Node: Selecting this button enables adding a new node to the drawing window by clicking on the drawing canvas. The default attribute is "Unlabeled". It is possible to change the attribute by clicking the node with right mouse button..
 Add Loop edge: Selecting this button allows adding a loop edge to an existing node. The default attribute is "Unlabeled". It is possible to change the attribute by clicking the edge with right mouse button. It is possible to add multi-loops from a node to another.
 Add Edge: Selecting this button enables adding a new edge to the drawing window by clicking on an existing node and to another one. The edge is directed. The default attribute is "Unlabeled". It is possible to change the attribute by clicking the edge with right mouse button. It is possible to add multi-edges from a node to another.
 Add approximate Path: Selecting this button it is possible to add an approximate path to the drawing window by clicking on an existing node and to another one. The default attribute is "?>0" (this means that the user wants an approximate path of length > 0). It is possible to change the attribute by clicking the edge with right mouse button. It is possible to add multi-paths from a node to another.
 Zoom in: Click to zoom in on the drawing window.
 Zoom out: Click to zoom out of the drawing window.
Motifs Toolbar
 Three Chain Motif: Selecting this button and clicking on the canvas adds a three chain motif to the drawing window.
 Feed Forward Loop Motif: Selecting this button and clicking on the canvas adds a feed forward loop motif to the drawing window.
 Bi-parallel Motif: Selecting this button and clicking on the canvas adds a bi-parallel motif to the drawing window.
 Bi-fan Motif: Selecting this button and clicking on the canvas adds a bi-fan motif to the drawing window by clicking on it.
Main Toolbar Buttons
 Create a new query.
 Load an existing query in sif format.
 Save a Query. It automatically creates three files: a ".sif" file containing the query, a ".na" file containing node attributes and a ".ne" file containing edge attributes.
 Change name of a query. This allows the drawn query to be renamed for ease of use in the main window. Otherwise, it will get a default name.
 Exit from query editor. If the query is not saved user will be prompted to save it.
 Clear drawing window. Press to clear the drawing window.
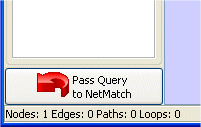 Pass the query to NetMatch. The new query will be uploaded in the "Query Selection box" in NetMatch window. The drawing tool main windows can be closed or can be left opened for other modifications.
Modify Node/Edge Attributes or Delete
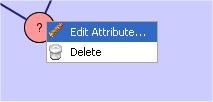
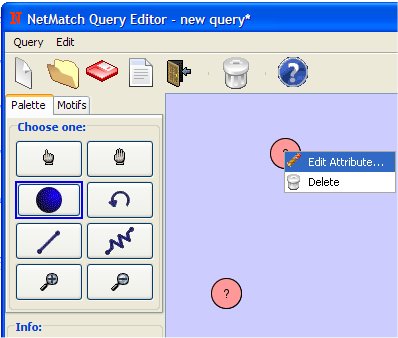
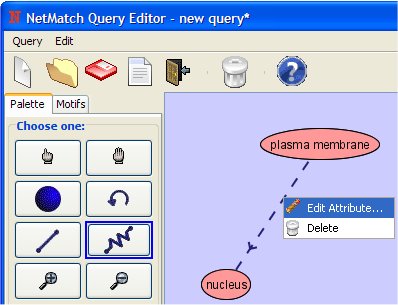
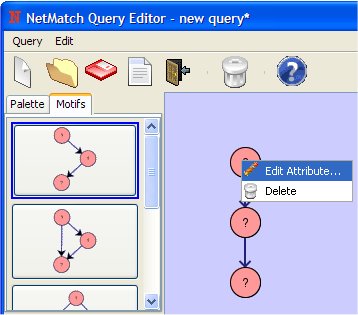
It is possible to edit a node, an edge or a path attribute by clicking on it with the right mouse button and then selecting the "Edit Attribute..." item menu.
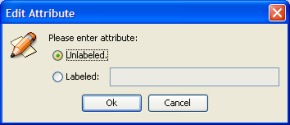
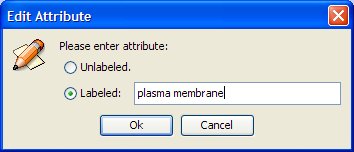
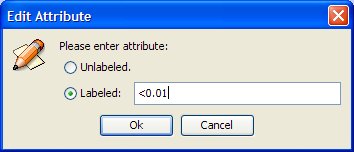
Node or Edge attribute: Once "Edit Attribute..." is selected, it is possible to add the attribute label by enabling the Labeled radio button and specify the label. Notice that, the attribute label (nodes/edges) in the query can be boolean, integer, floating point, and string. NetMatch supports also relational attributes for nodes: > int_val/floating_point_val, < int_val/floating_point_val, >= int_val/floating_point_val, <= int_val/floating_point_val.
Notice that in current version of NetMatch list attributes in the query cannot be defined. These will be defined in the next version of the software.
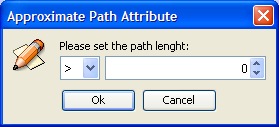
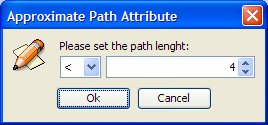
Approximate path attribute: A Path attribute can be modified in the same way by clicking with the right mouse button. The path length must be greater equal or less than a specific value.
Load/Save a query
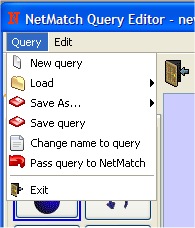
- Select "Query/Load/Load Query..." to load a query in sif format.
- Notice that, if the file namequery.sif is loaded and the directory contains also the attribute files namequery.NA and namequery.EA, these will be loaded too. To load different nodes or edges attributes use "Query/Load/Load Node Attributes..." and "Query/Load/Load Edge Attributes..." respectively
- The first time a query file is saved through the "Query/Save As.../Save query as..." item menu, this will create three files, namequery.sif, namequery.na, namequery.ea containing the query structure, the node attributes and edge attributes respectively.
- To save again use the option "Query/Save Query". This will updates the files already created.
Using Wizard
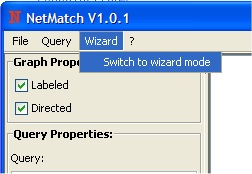
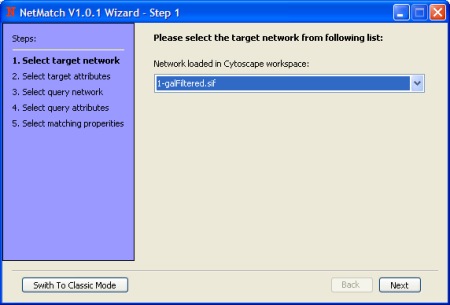
Start NetMatch in Wizard mode.
- Select the target network.
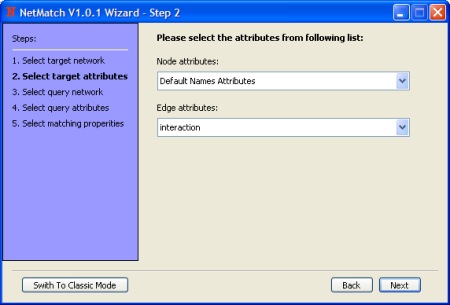
- Select nodes and edges attributes for the target network.
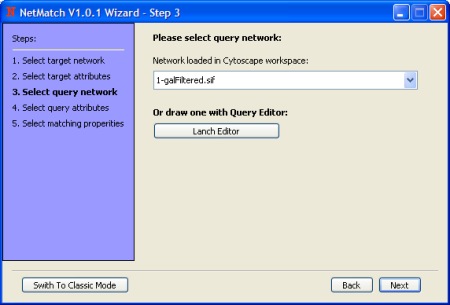
- Select query network or draw a query.
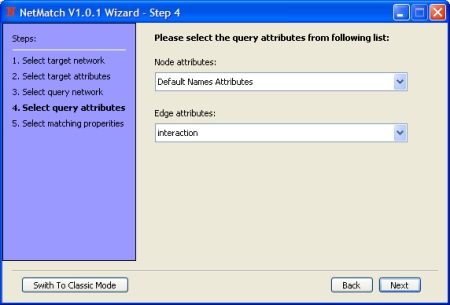
- Select nodes and edges attributes for the query. Notice that, if the query has been drawed with the query drawing tool, nodes and edges attributes will be those defined through the drawing tool.
- The radio buttons (Labeled/Unlabeled) enable/disable nodes and edges labels usage (i.e. if the target network and/or query have labels and "Unlabeled" is selected these will be treated as an unlabeled networks).
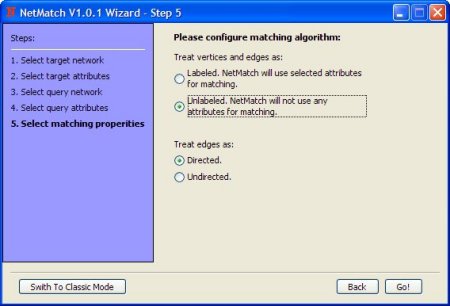
The radio buttons (Directed/Undirected) enable/disable edges direction for both query and target network (i.e. if "Undirected" is selected target network and query will be treated as an undirected graphs)
NetMatch by Example
Find all feed-forward loops in galFiltered.xgmml network
Load GalFiltered.xgmml file from Cytoscape File menu (it is in sampleData directory).

Run NetMatch.

- Select drawing tool.

- Select "Feed Forward Loop" from the Motifs panel.
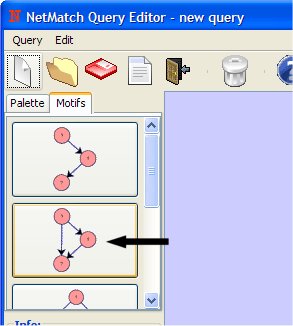
- Click on drawing canvas with left mouse button. This will add a Feed Forward loop.
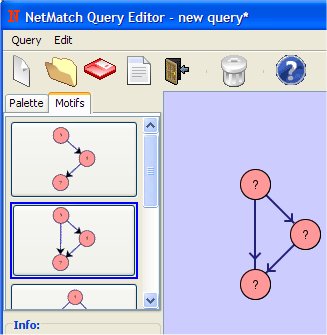
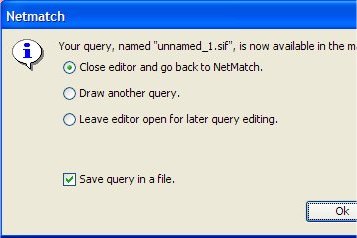
Click on "Pass to NetMatch" button to upload the query to NetMatch main window. It is also possible to save the query or change its name. The drawing tool window can be closed or can be left opened for other modifications.

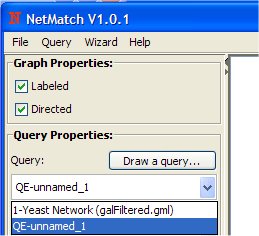
- Make sure from the Query Properties box the new query (QE-unnamed_1) is selected.
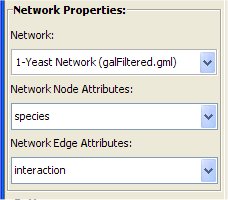
- Make sure from the Network Properties box "Yeast Network (galfiltered.gml)" is selected.
- Click the "Go" button to start the matching.

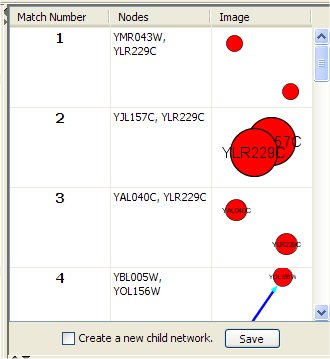
- The result is showed in the upper left panel. By clicking on a match, the corresponding nodes and edges will be highlighted in the Cytoscape main window.
NetMatch by Example
Find all "short" paths from proteins located in the plasma membrane to proteins in the nucleus in galfiltered.xgmml network
Load GalFiltered.xgmml file from Cytoscape File menu (it is in sampleData directory).

Run NetMatch.

- Select drawing tool.

- Select "Add Node" from Palette Panel clicking on it with left mouse button.
- Add two nodes on drawing canvas (clicking with the left mouse button).
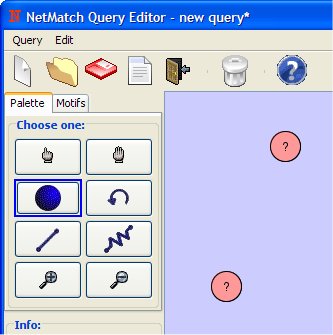
- Change the attribute of the first node clicking on it with the right mouse button.
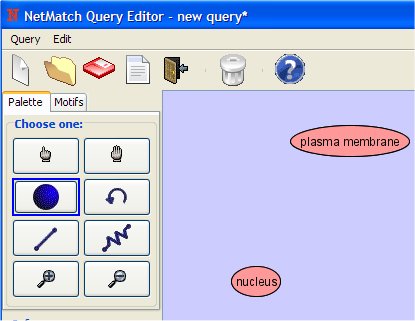
- Set the attribute as "plasma membrane" (notice that the tool is case sensitive).
- In the same way, change the attribute of the second node in "nucleus".
- Select "Add Path" from Palette Panel clicking on it with left mouse button.
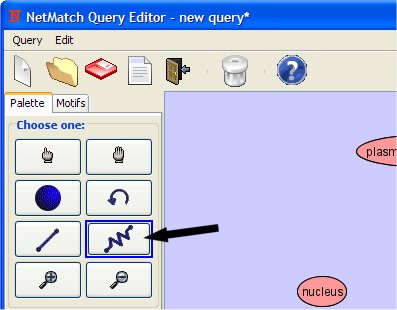
- Add the path clicking with the left button, first on "plasma membrane" node and then on "nucleus" node.
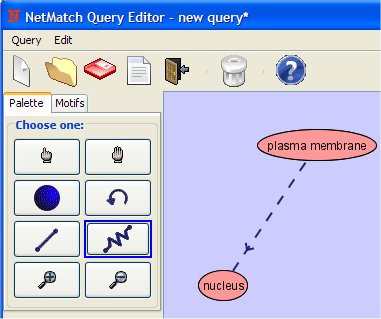
- Change the attribute of the path clicking on it with the right mouse button.
Set the path attribute as "<4" (we want a path with length <4).
Click on "Pass to NetMatch" button to upload the query to NetMatch main window. It is also possible to save the query or change its name. The drawing tool window can be closed or can be left opened for other modifications.


- Make sure from the Query Properties box the new query (QE-unnamed_1) is selected.

- Make sure from the Network Properties box "Yeast Network (galfiltered.gml)" is selected.

- Select from the Network Node Attribute menu the "GO Cellular Component" attribute.
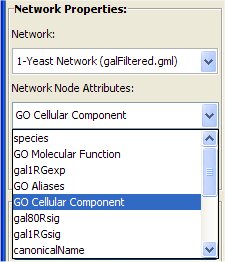
- Click the "Go" button to start the matching.

- The result is showed in the upper left panel. By clicking on a match, the corresponding nodes and edges will be highlighted in the Cytoscape main window.
NetMatch by Example
Find all three-chain motifs in galfiltered.sif network where the genes are all significantly differentially expressed (Gal1RGsig < 0.01)
Load GalFiltered.sif file from Cytoscape File menu (it is in sampleData directory).

- Load gene expression attributes "galExpData.pvals" file from Cytoscape File menu (it is in sampleData directory).
Run NetMatch.

- Select drawing tool.

- Select "Three chain loop" from Motif Panel clicking on it with left mouse button.
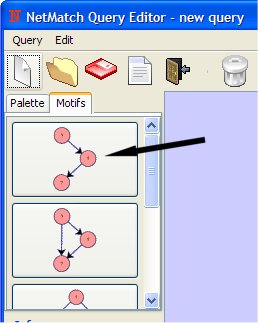
- Add The Three Chain on drawing canvas (clicking with the left mouse button).
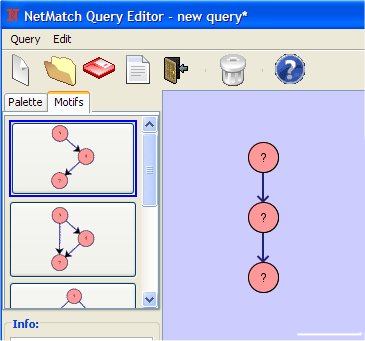
- Change the attribute of the first node clicking on it with the right mouse button.
Set the attribute as "<0.01" (all nodes in the network having a value in the specified attribute <0.01 will match).
In the same way, change the attributes of the remaining nodes to "<0.01".
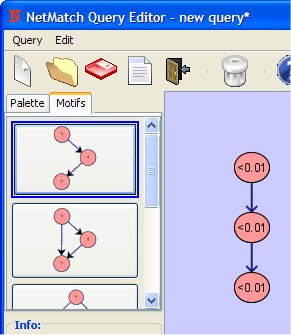
Click on the Pass to NetMatch button in order to upload the query to NetMatch main window. It is also possible to save the query or change its name. The drawing tool main windows can be closed or can be left opened for other modifications.


- Make sure from the Query Properties box the new query (QE-unnamed_1) is selected.
Make sure from the Network Properties box "GalFiltered.sif" is selected.
- Select from the Network Node Attribute menu the "gal1RGsig" attribute.
- Click the "Go" button to start the matching.

- The result is showed in the upper left panel. By clicking on a match, the corresponding nodes and edges will be highlighted in the Cytoscape main window.
Download
Download jar plugin, together with example data.
Version 1.0.1 - 22/12/2006 (bug fix with approximate path search, Nov.7.2007)
Developed by:
A. Ferro, R. Giugno, G. Pigola, A. Pulvirenti, D. Skripin
Department of Mathematics and Computer Science - University of Catania
Viale A. Doria 6, I-95125 Catania, Italy.
email:{ferro,giugno,pigola,apulvirenti,skripin}@dmi.unict.it
G. Bader
Banting and Best Department of Medical Research & Department of Medical Genetics and Microbiology
University of Toronto
160 College St., Toronto, Ontario, Canada M5S 3E1
e-mail:gary.bader @ utoronto.ca
D. Shasha
Courant Institute of Mathematical Science - New York University
251, Mercer Street, New York, NY 10012, U.S.A.
email:shasha @ cs.nyu.edu