WordCloud Parameter Tutorial
Outline
This tutorial will guide a user through how to use and manipulate the parameters associated with the WordCloud app using the Cytoscape session file provided. See the WordCloud Basic Tutorial for an introduction to using the basic functionality of the WordCloud plugin.
Pre-requisites -
Cytoscape >= 3.1 must be installed
The WordCloud plugin must be in the CytoscapeConfiguration/3/apps/installed folder
- Download the test data
Go to this page to download the plugin and test data
Instructions
WordCloud Version 3.0.1 or newer
1. Open Cytoscape
2. Open the provided sample data file (File / Open / select the file AlzheimerEM.cys)
3. Be careful not to change the set of selected nodes for the network titled "EM1_Enrichment Map" as this will change the results that you will get.
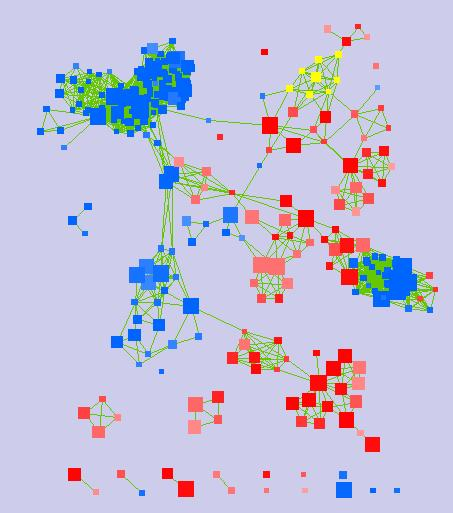
The example network with the correct set of nodes selected:

4. In the main menu select Apps > WordCloud > Show WordCloud - this will bring up the WordCloud Input and Display panels.
5. Under "Current Values" in the Input panel change the selected attributes to just EM1_GS_DESCR. This will change what node attribute are used when performing the semantic analysis and creating the cloud. A WordCloud is automatically created in the WordCloud display panel.
Expected Original Cloud:

6. Expand the Advanced section of the Input Panel. Change the Max Num of Words from the default of 250 to 5. This will cause only the top 5 most significant words to appear in your cloud.
- Word significance is correlated directly with the size of the word in the display. If you have cloud display style selected that includes clustering (which you do for this example) ties are broken using cluster membership. Also, notice that clusters are organized by decreasing order of importance where importance is determined using both the number of words appearing in a cluster as well as their size.
Expected Result:

7. Set Max Num of Words back to 250.
8. Change the Word Aggregation Cutoff from 1 to 50.
- Setting the Word Aggregation Cutoff to 50 for this cloud places this value higher than the word aggregation value for all pairs of words that appear in the selected nodes. As a result, each word will be in its own cluster for this example.
- In general, a higher Word Aggregation Cutoff value means that the requirements for clustering are more stringent and as a result there will be more, smaller clusters.
- In general, a lower Word Aggregation Cutoff value (minumum of 0) means that the requirements for clustering are less stringent and as a result there will be fewer, larger clusters. However, since our clustering algorithm takes into account the order that the words appear, it is unlikely that a Word Aggregation Cutoff value of 0 will result in a single large cluster.
Expected Result:

9. Set Word Aggregation Cutoff back to 1.
10. Previously, the size of words in the word tag cloud was based entirely on the selected nodes. The Normalization slider allows the size of words to be calculated also using the make-up of the entire network. Try dragging the slider bar all the way from 0.0 to 1.0 and watch how the word tag cloud changes in real time.
- Setting the Normalization to 0 means that the size that the words appear in the cloud is directly proportional to how often they appear in the selected nodes - no weight is given to how often they appear in the whole network. In this example, Cancer is the largest word in the cloud, which means that it is the most frequently appearing word in the selected nodes.
- Since changing the Normalization parameter affects the relative importance for each word, changing its value also affects how clustering occurs. A user should expect that changing this parameter will likely change how the words for a cloud are clustered.
Expected Result with Network Normalization = 1.0:

11. Set Normalization back to 0.0
12. In the Cloud Style combo box select Clustered-Boxes as the Cloud Style.
Expected Result:

13. In the Cloud Style combo box select No-Clustering as the Cloud Style.
Expected Result:

14. Set the Cloud Style back to Clustered-Standard.
15. Click the Excluded Words button, a dialog will pop-up. Add the word "cancer" to be excluded (hit the add button after typing the word) then click ok.
- The word cancer will no longer appear in the cloud.
Expected Result:

16. Open the Excluded Words dialog again. Click on the word "cancer" then click Remove.
17. Under the section with the heading --Flagged Words-- select the word "kegg". Hit the Remove button and then click ok.
- The word "kegg" is no longer being filtered out and will now appear in the word tag cloud.
- Since the word exclusion list is stored at the network level, the word "cancer" will continue to no longer appear in any newly created clouds.
Expected Result:

18. Click the Delimeters button, a dialog will appear.. Under the section with the heading --Common Delimiter-- select the "space" option. Hit the Remove button then click Ok.
- The space marker is no longer used as a word delimiter when doing tokenization. As a result you can create you cloud based on word phrases.
Expected Result:

19. Add the space character back to be used for tokenization.
20. Click the Enable Stemming checkbox.
- Words are now all mapped to their stem using the Porter Stemming Algorithm. This will allow words like "cell" and "cells" to both be mapped to their common stem "cell" in the cloud display.
- However, the user should notice that the stem chosen for a word may be somewhat unexpected. For example, in the cloud used thoughout this tutorial the word "endometrial" will now be displayed as "endometri" because the ending suffix has been removed in orde to isolate the word stem. Also, the word "pathway" is now represented with the stem "pathwai".
Expected Result:
